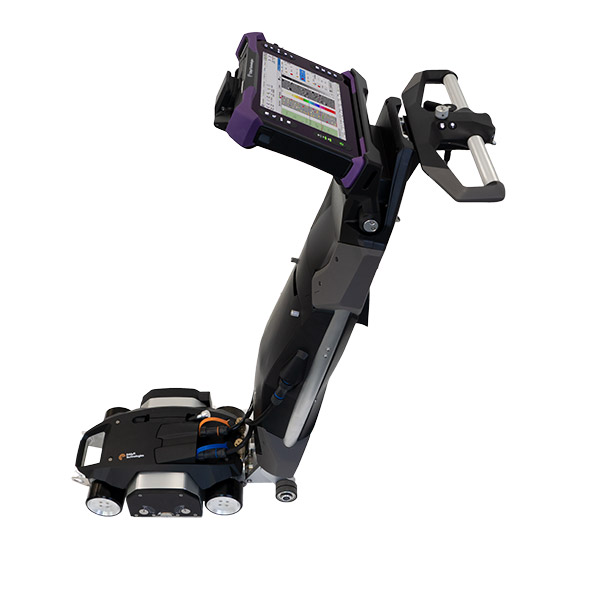
Floormap®X is the latest multi-technology MFL Array tank bottom solution. It offers an unmatched probability of detection – including in the critical zone and can address thick plates and coatings brilliantly. Thanks to patented STARS technology, it provides top/bottom corrosion discrimination. Blazing fast, it can either be used in full floor mapping or Freescan™ mode. FloormapX increases your efficiency when inspecting tank bottoms like no other system.
The Floormap combines two distinct technologies, MFL and STARS. The introduction of STARS (Surface topology air-gap reluctance sensors) enables the scanner to determine whether there is corrosion top side, bottom side or below the surface coating.
Improved signal to noise ratio combined with STARS and MFL ensures a more accurate and efficient inspection of coated and thicker plates.
MFL Array: 64 channel, 128 multi-orientated MFL sensors, configured to produce the highest resolution imaging and market leading Probability of Detection (PoD). On its own, MFL cannot differentiate if the corrosion is top side or bottom side of the tank bottom.
STARS: Our patented technology enables the FloormapX to differentiate between the top side and bottom side corrosion and report them separately. STARS also generates detailed top surface image profiles which contribute vital tank integrity information.
The smartMAGNET design, inclusive of the most powerful rareearth magnets, injects up to 30% more magnet flux into the inspection surface compared to previous models. This allows the FloormapX to detect smaller defects and for the first time inspect tank bottoms up to 20 mm (3/4 in) thick with a high sensitivity. The magnets can also be controlled and set to an ‘off’ condition for easier, safer handling, cleaning and transportation.
Precison active steering facilitates the inspection of the critical zone to within 12mm (1/2 in) of the shell wall ensuring the FloormapX maximizes coverage in the most important areas. A reduced profile and ability to tilt the handle also allows for increased coverage under pipework, allowing for a more comprehensive inspection.
Maximum coverage, including critical zone
High-resolution for increased Probability of Detection
Multi-technology for top and bottom defect discrimination
Flexible scanning, one scanner with three scan modes
Inspect thicker plates up to 20 mm (3/4 in) thick
Unmatched reporting, comprehensive and on-the-spot
10% reporting thresholds, increase inspection intervals
EEMUA 159 and API 653 compliance
Precision active steering:
For fast, high-quality curved scans in the critical zone and elsewhere. It drastically reduces dead zones by placing sensors where they are needed most: within 12mm of the tank shell. Comes with the capability to return to straight-line driving at the simple push of a button.
Marking the floor while you map is now fast and easy, thanks to laser-assisted defect location. The laser line is simulated live in the C-scan, allowing to correlate the physical location of tank floor defects with C-scan indications.
Variable automated magnetic flux strength for optimized inspection performance depending on plate thickness. Besides, literally turn off powerful rare earth permanent magnets for easier placement during critical zone inspection, storage and shipping, and safer handling.
Reach maximum sensitivity where conditions allow, and easily raise the bridge to scan even in the most challenging conditions, such as undulated plates, repair plates and lap welds or when surface preparation is not ideal.
Front dimmable, focalized LEDs, with diffusing lens and rear LEDs. Based on chip-on-board technology providing high and uniform intensity, inline with API recommendations for visual inspection, to perfectly highlight product-side pitting and scan obstacles.
Optimized design for intuitive and ergonomic breaking of the magnets by operators.
Product Picture
