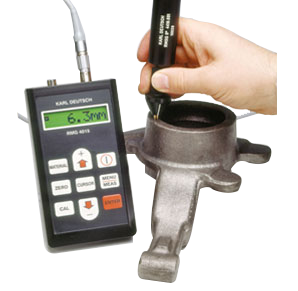
Our new crack depth gauge RMG 4015 measures crack depths on workpieces of iron, ferrous and austenitic steels and can also be used for cracks in copper, brass, aluminium and other non-ferrous metals. For the measurement of oblique cracks a special oblique cracks probe is available.
A probe with four spring-loaded and gilded contact pins is positioned across the crack to be measured on the workpiece. A constant alternating current is passed via two of the pins into the workpiece; the two other pins measure the voltage drop across the crack, where the crack depth is derived from. The a.c. of the instrument utilizes the skin effect, which forces the current flow to the surface of the conductor and therefore follows the contour of the crack. The operation and measured value formation are monitored by the microprocessor of the gauge. Incorrect handling or faulty measurements caused by wrong attachment or imperfect contacts therefore are out of question.
In addition to common cracks running in most cases perpendicularly to the surface, the real life often shows oblique cracks, where usually it is not the expansion of the cracks which is of interest, but the oblique orientation and the projection with reference to the surface. If you know these measures it can be decided whether the post-treatment of a workpiece with cracks is technically possibly and economically reasonable. Therefore the instrument was equipped with an additional measuring function for the determination of oblique cracks, which permits to determine the inclination of the crack with respect to the material surface. The measurement is executed by means of an special four-pin probe, which permits to connect an external current pole which can be positioned left and alternatively right to the crack. Via the differences of the readings and the crack depth measured as well, the meter reliably will determine the inclination and the projection perpendicularly to the surface. Measurement is possible on all common magnetic and non-magnetic steels, with certain restrictions also on many non-iron metals. Thus the new pocket-sized instrument for crack measurement may be used universally for all types of naturally occurring cracks.
Via the RS232 interface, test reports can be printed on small-sized printer (available as accessory) or the instrument can communicate with a PC. For this purpose, the PC program iCom is available, which not only acquires the measured values, but also offers data administration and graphical display. Furthermore, test reports or other documentations can be created.
Product Picture
